
DIY bleached wood guide
In this guide, I will walk you through how to lighten raw wood; whether natural or covered in stain and lacquer. For this project, I worked with a solid wooden table that I believe to be pine. With the steps below, I drew out the orange/red tones to get a beautiful light antique raw wood look.
What you need:
Real wood (no veneer)
Cheap paint brushes (I used 2)
Bleach
Oven cleaner (maybe 2 or 3, I only had 1 but just did the legs)
CitriStrip (if you have heavy lacquer)
Sander (Not 100% nessacary)
Finishing Oil (or sealer of choice)
Step One:
Assess your wood. What type is it? How thick is the stain or lacquer? The more on it, the more layers you will have to strip away resulting in more work.
I would advise you to do a test section with CitriStrip first. This product is best for heavier woods. When I used it on my pine it tore it up a bit and it required some sanding to fix it. I also left it on overnight though, so maybe don’t do that. Don’t be afraid to work with it, but just know it will penetrate the wood well, especially if you are like me and had fairly raw wood to start with. Depending on how your test patch works you may have to cover your wood with this several times. Below is a photo of me testing it out. It didn’t do much for me other than tear up my wood. I didn’t need it because my table was almost raw and only had a light layer of wax or oil. Because of that, I moved on to step two.

Step Two:
Next, move on to the oven cleaner and Dawn Dish Soap. This combo is best for lighter layers of stain and oils from overtime use. The oven cleaner is great to get into the details that you don’t want to sand. In my example, I used it for the legs and light details on the border of my table as pictured below.
I went ahead and applied it and let it sit for 15 minutes while I sanded the top. You don’t have to sand if you were able to strip everything from step one. Again, feel it out. I wish I had done oven cleaner on everything instead of sanding because I lost some nice texture on the top after sanding. Sometimes it will be inevitable but work around it if you can. After letting it sit I grabbed the hose, Dawn Dish Doap, and wire scrub brush. I scrubbed down the pieces I had sprayed, lathering with dawn and water as I went. I ended up letting it dry and repeating this process one more time before moving on.

Step Three:
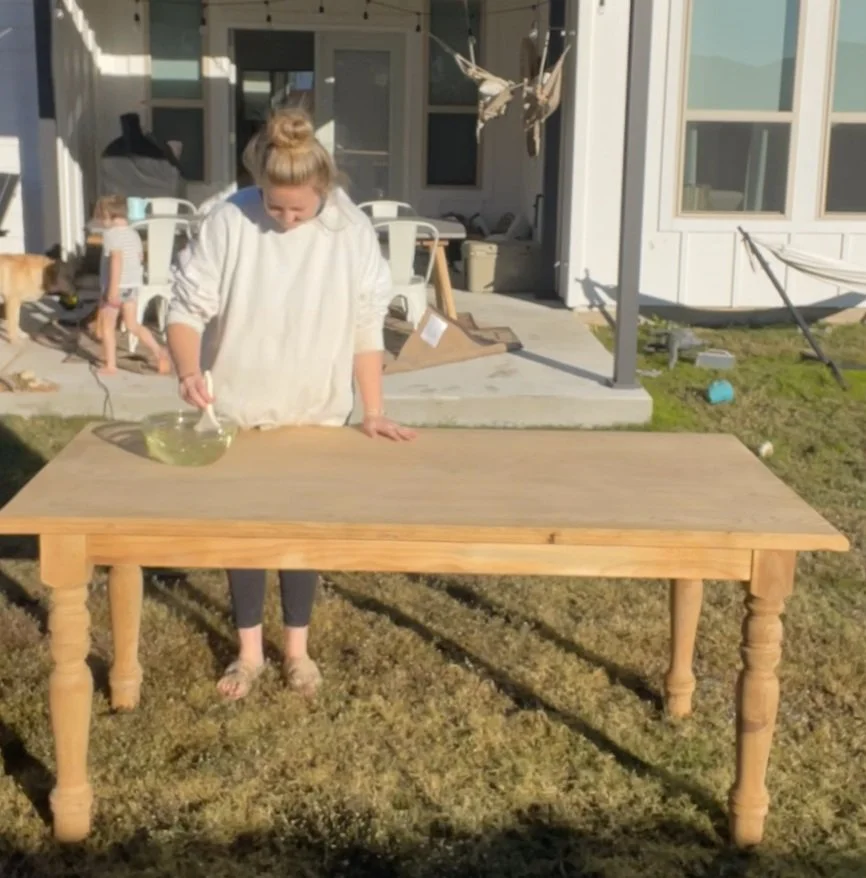
After you get off all the layers that are on your wood you can proceed to the next step… Bleach. This was a really fun step because you start to see the character come through. It starts to look like a completely different table. I went over it with a 1:1 mixture of water/bleach twice. I let it dry in the sun the first time and then did another coat before bed.
Step Four:
The last step is your sealer. I opted for a finishing wax because I didn’t want the color to change. I did two layers of the wax but I would have liked to do a few more. I have kids and they are professional mess makers. If you opt for a wax, make sure to follow the direction of the grain and don’t leave any drips or puddling. You will be able to see it after it dries and it will bother you forever.
This is optional, but another step I did was sand in between wax applications. I went over the whole top with a very light sander and then applied the second coat. I will say, I feel like some places soaked in the wax more than others so I would definitely suggest doing more coats than I did.

Take Aways:
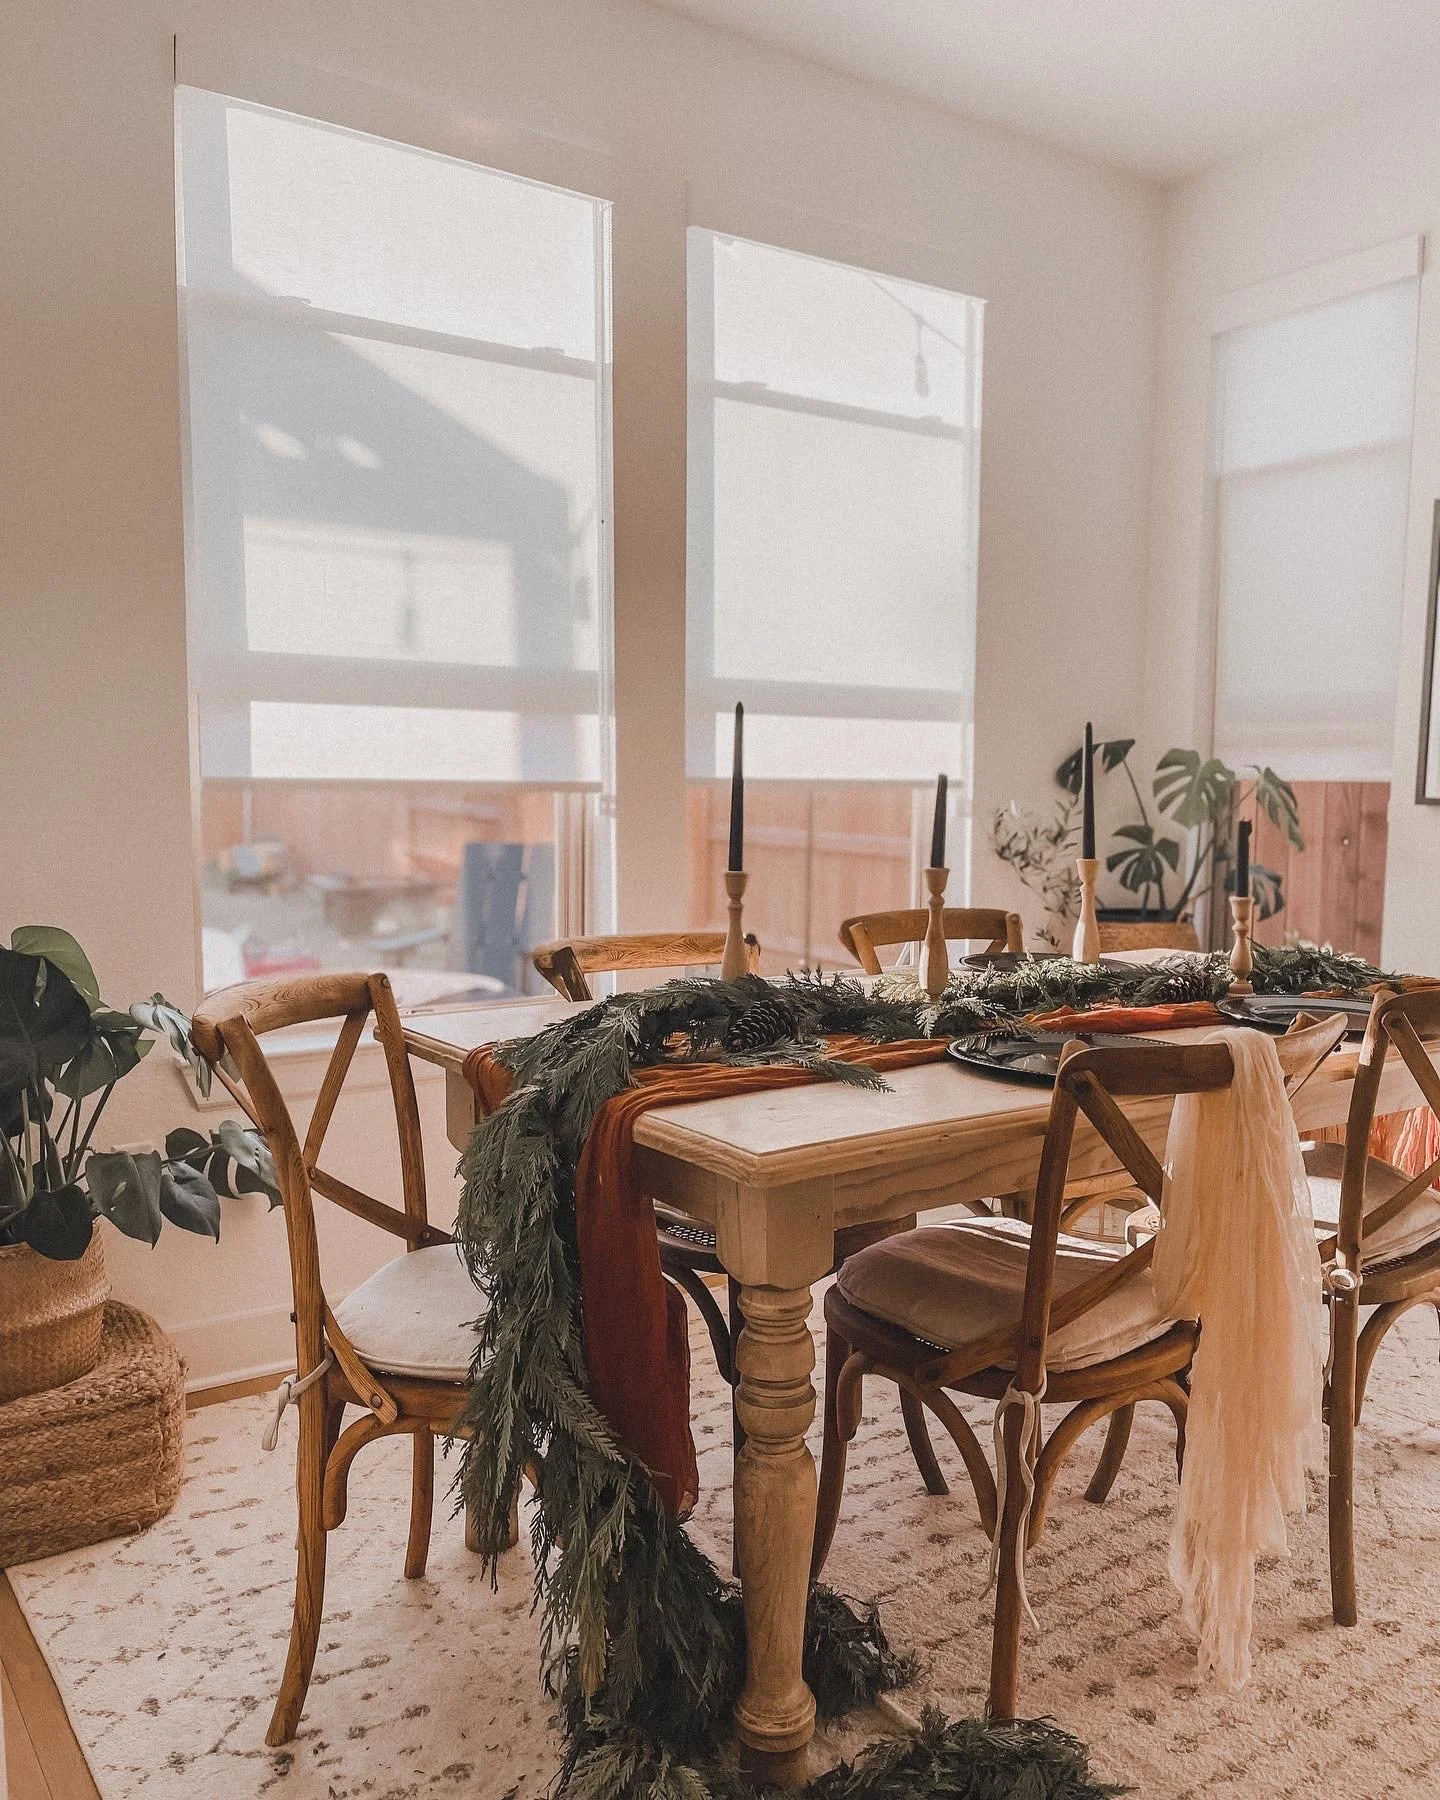
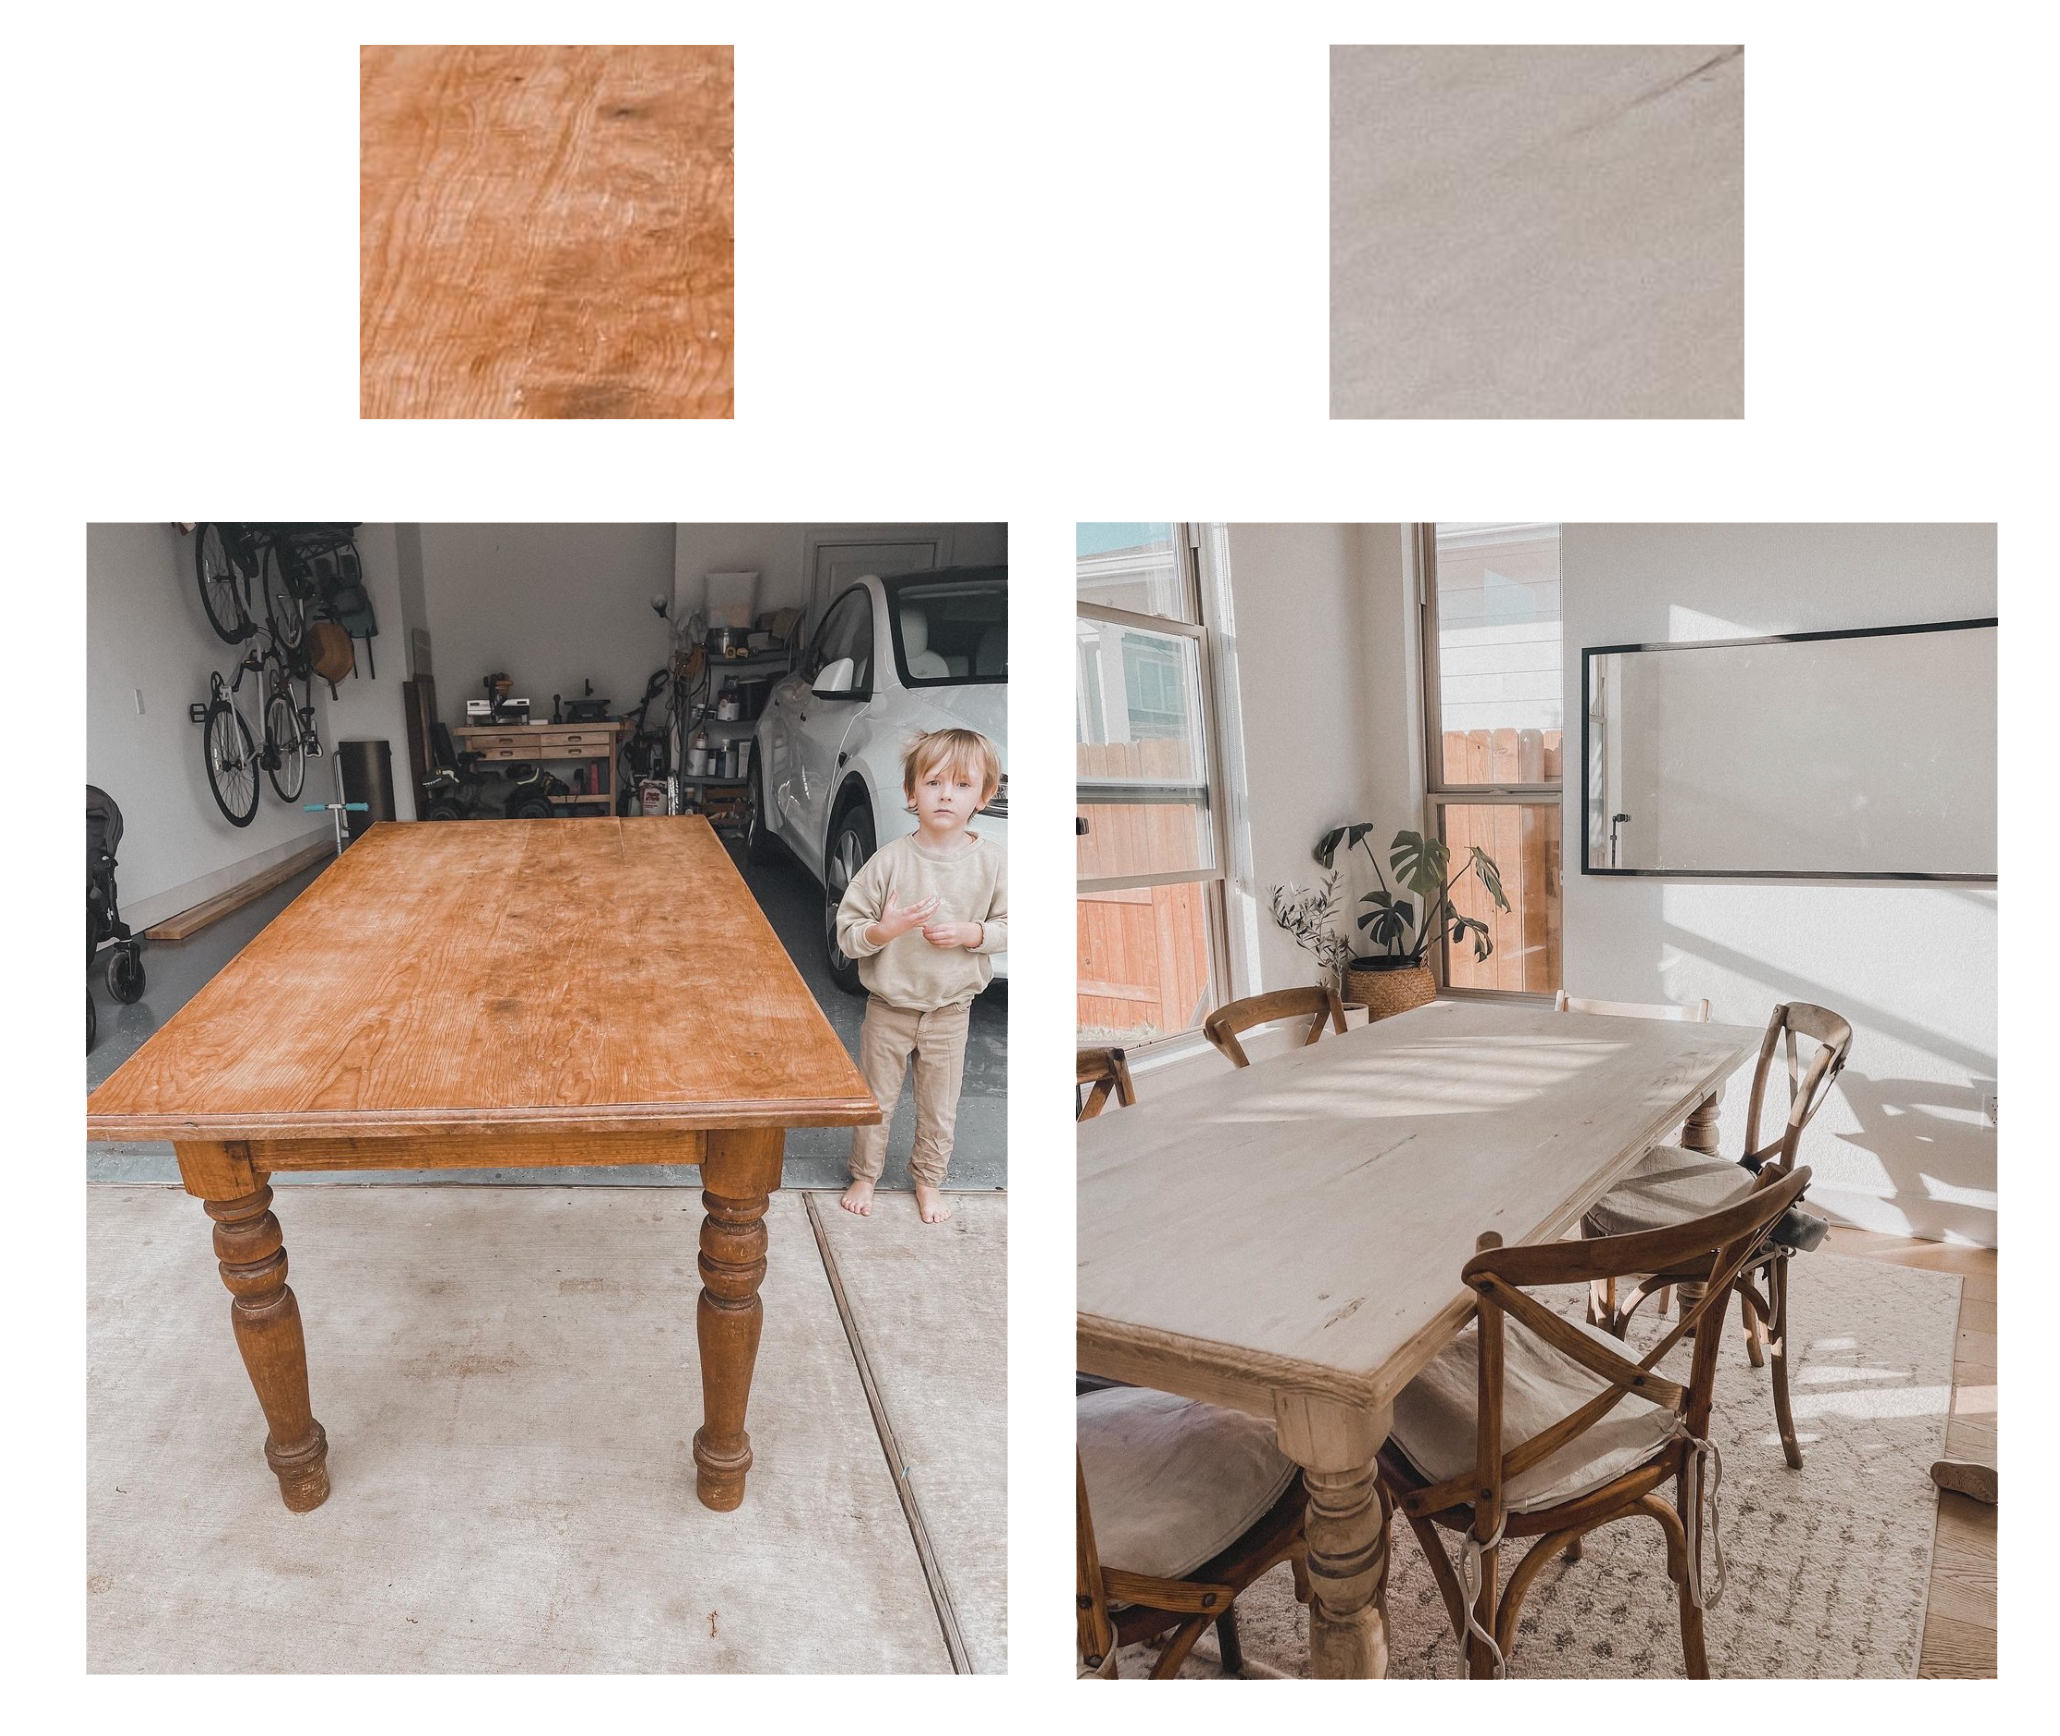
I really liked this process. I would definitely recommend it and will be doing it again at some point. Overall the color is completely different. I didn’t think I’d be able to achieve this look so easily, but it really was seamless. Below is a swatch and full view of the table before and after. If you want to see more projects like this follow along on my Instagram.
Well, that's it! You did it! Thanks for following along and using this as a guide. I hope it was helpful and empowering. You can do this. You really can!
All my love,
Ashley